How to Paint Metal Surfaces to Prevent Rust
To protect metal from rust, remove loose corrosion and failing paint, clean and dry the surface, then apply a compatible rust-inhibiting primer and finish. Follow the coating manufacturer’s preparation and recoating directions, and repair chips before exposed metal starts to corrode.



Before choosing a color for a rusty railing or patio chair, take a closer look at the surface. Is the old finish firmly attached or peeling away? Is the rust easy to reach, or hidden around joints? These details help determine the preparation needed before painting.
Check that the primer and finish are suitable for the metal and compatible with each other. Plan how you will reach corners, backs, and undersides, not just the areas visible when the job is done.
[toc]
Why Metal Surfaces Rust and How Paint Stops It
Paint works as a barrier, so it helps to know what it is protecting the metal from. The sections below cover how rust starts, what a finish does, and why preparation decides the result.
The Science Behind Metal Corrosion
Rust forms when iron or steel reacts with moisture and oxygen. Aluminum and galvanized surfaces behave differently, so identifying the material matters before you choose supplies. An orange patch on steel is not the same preparation problem as a dull, weathered aluminum surface.
Look closely at joints, feet, fasteners, and horizontal ledges. These areas can hold moisture or collect dirt. If a railing is deeply pitted, perforated, or loose at its attachment points, have its condition assessed before treating the problem as cosmetic.
How Paint Creates a Protective Barrier
A continuous metal coating separates the surface from exposure. Primer helps establish a suitable base, while the finish provides the exposed protective layer. Gaps, chips, and missed edges leave places where moisture can reach the substrate.
To help prevent rust on metal, think about the whole surface, not just the visible face. The underside of a chair frame and the back of a railing need attention too. Coverage around joints matters as much as a smooth-looking front.
What Happens If You Skip the Prep Work
Paint needs a sound surface to hold onto. Loose rust, peeling layers, grease, and sanding dust can remain between the new coating and the metal, undermining the work before the finish sees regular use.
Applying rust prevention paint over an unstable surface does not fix that weakness. If the material underneath lifts, the fresh paint can lift with it. Preparation should leave a firm, clean base rather than simply make the object look less rusty.
How to Prepare Metal Surface Before Painting
Before you paint metal surfaces, identify the substrate and read the preparation instructions for the complete coating system. Set up a protected work area, arrange ventilation, and follow the labels for personal protection. If an older coating may contain lead, get appropriate testing and safe-work guidance before disturbing it.
Clean the Surface from Dirt
Remove accumulated dirt and grease before abrasive preparation so you are not working contamination into the surface. Use a cleaner approved for the substrate and the coating you intend to apply. Follow its directions for dilution, removal, and rinsing rather than improvising with household chemicals.
Pay attention to hand-contact areas, oily hardware, and furniture that has been treated with sprays or polishes. For a manageable metal painting project, detach removable pieces only when you can do so safely and reassemble them correctly. Keep paint off moving parts and surfaces that must remain uncoated.
Remove Existing Rust Completely
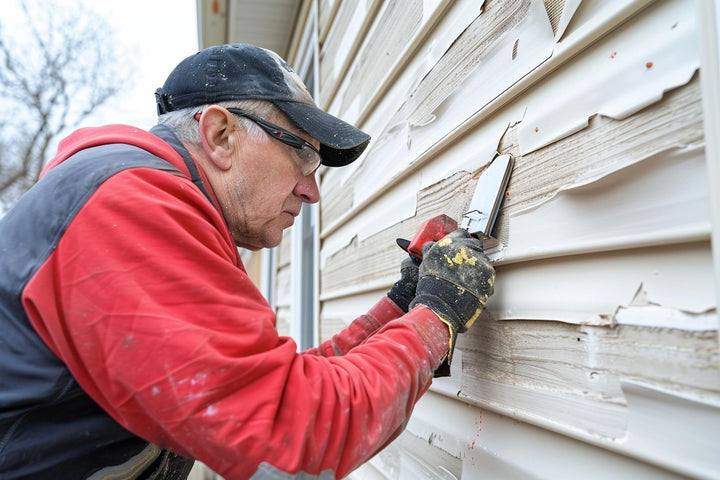
Remove all loose rust, lifting paint, and flaky scale with methods appropriate to the object. A scraper, wire brush, or suitable abrasive may be useful, but the goal is a stable surface, not merely a change in color. Wear protection suited to the tools, dust, and old coating.
Work into accessible corners and around fasteners. Feather the edges of sound existing paint so the transition to exposed metal is not abrupt. Follow the chosen system’s requirements for any tightly adhering rust that remains; some systems require more thorough removal than others.
If you cannot reach the corrosion inside a joint or beneath a failing attachment, pause and reassess access. Painting across the opening is not a substitute for preparing the hidden surface.

Not sure which supplies fit your project? Bring Kompozit photos of the surface and details about the existing finish so you can discuss preparation and coating compatibility before buying. For a rusty steel railing or patio chair, ask for a rust-inhibiting primer and a compatible finish labeled for outdoor steel use.
Apply Rust Converter if Needed
A converter is an optional, product-dependent treatment, not a required step for every rusty object. Consider one only when its instructions permit the remaining corrosion and the primer or finish manufacturer accepts the treated surface.
Check the complete sequence before applying it. Whether the treatment needs rinsing, further cleaning, or a waiting period depends on its directions. Do not assume that a product labeled anti rust paint can go directly over any converter, or that conversion replaces removal of loose scale.
Wipe Down and Let It Dry
Remove preparation dust using the method specified for the coating. If a final cleaning wipe is required, use the recommended cleaner and a clean cloth. Avoid leaving cleaner residue, lint, or contamination from a previously used rag.
Let the surface dry as directed, including seams and recessed areas. Check for moisture again before opening the primer. A clean-looking front face does not tell you whether water remains around a joint or underneath a horizontal rail.
How to Apply Paint on Metal
Lay out the application sequence before starting. Confirm that your metal surface paint is approved for the substrate, the existing coating if any remains, and indoor or outdoor exposure as appropriate. Keep the product directions available throughout the job.
Apply First Coat of Primer
Choose a primer explicitly suitable for the metal and compatible with the finish. Steel, galvanized metal, and aluminum should not be treated as interchangeable substrates. If the selected system allows direct application without a separate primer, follow that system rather than adding an unrelated product.
Apply primer evenly with an approved brush, roller, or spray method. Work it onto exposed edges and accessible joints without leaving heavy accumulations. Watch the underside for drips, and avoid repeatedly brushing an area after the coating begins to set.

Sand Between Coats
Sand between coats only when the product instructions require or allow it. Do not treat sanding as an automatic step while primer is still soft. If smoothing is appropriate, focus on nibs, runs, and rough transitions without unnecessarily exposing the metal again.
Remove the resulting dust before continuing. Where sanding cuts through the primer, restore coverage according to the system’s directions. A smoother appearance is not helpful if it leaves an unprotected edge.
Apply Second Primer Coat if Needed
Check the primer label and inspect the surface after the permitted drying period. Additional primer may be appropriate where the system calls for it or where application has left missed areas. Do not add it simply because more material seems safer.
Resolve runs, contamination, or lifting before covering them. If the primer wrinkles or separates from the old finish, stop and determine the cause rather than trying to hide the problem under another layer.
Use First Coat of Paint
Stir and apply the finish according to its label. When choosing paint for metal, check its intended use rather than relying on the color, sheen, or the appearance of the container. Decorative appearance alone does not establish suitability for an exposed steel gate.
Plan a route that lets you reach the back and underside without leaning against wet paint. Use a brush suited to narrow details and the approved application method for broad areas. Keep the film even; do not try to finish faster by leaving a heavy layer.
Drying Time
Use the product’s stated recoat window, not a general online timetable. Dry to the touch, ready for another coat, and ready for normal use are different milestones. Check the directions for both the primer and the finish.
Compare actual conditions with the permitted application conditions before continuing. For outdoor work, account for rain and condensation as well as the daytime forecast. If the recoat window has passed, check whether additional preparation is required.
Apply Final Coat and Finish
Apply the remaining finish coats required by the selected system, observing its recoat instructions. Check coverage from different angles, especially at corners, welded joints, undersides, and any areas repaired during preparation.
After application, protect the work from contact and exposure as directed while it becomes ready for service. Wait until the finish permits handling before reinstalling hardware or returning furniture to use. Keep the product name and application instructions for future repairs.
Visit Kompozit in Deerfield Beach to discuss your project and the preparation, primer, and finish it needs. Bring the labels of products you already have so compatibility can be part of the conversation. Ask for a rust-inhibiting primer and compatible finish approved for your metal and its exposure, rather than choosing by color alone.
How Long Does Paint Protection Last on Metal
How long a finish holds up depends on the product, the preparation, and where the piece lives. The notes below explain what to compare and what to watch for after the job is done.
Average Lifespan by Paint Type
There is no useful universal lifespan to assign from paint type alone. A meaningful service-life claim needs a specified product, preparation standard, exposure, and maintenance plan. Without those details, quoting years would create an expectation the project may not support.
When comparing rust resistant paint options, look for documented suitability for your conditions. Ask what preparation is required, whether a separate primer is needed, and how damage should be repaired. Those answers are more useful than a broad durability label.
Factors That Speed Up Paint Deterioration
Exposure and use shape maintenance needs. Look for places that stay wet, collect debris, rub against hardware, or get struck during everyday use. On outdoor furniture, inspect feet and contact points along with the more visible surfaces.
Maintaining metal paint protection means checking the finish rather than waiting for widespread peeling. When you find a chip, examine the surrounding coating, prepare the damaged area, and repair it using compatible materials. Also address the source of recurring damage where possible.

Mistakes When Painting Metal
Use this checklist before application and whenever the work does not look right:
- Choosing by color alone. Confirm the substrate and exposure listed for the product before selecting the shade.
- Leaving unstable material underneath. Recheck rusted edges and lifting old paint after cleaning and preparation.
- Mixing unrelated products. Verify the converter, primer, existing finish, and new topcoat can work together.
- Missing concealed areas. Inspect backs, undersides, and accessible joints instead of concentrating only on the front.
- Applying too heavily. Follow application directions rather than using extra thickness to cover preparation defects.
- Ignoring weather or recoat limits. Check the label and actual conditions before each application.
- Covering a structural problem. Get weakened or unsafe components assessed instead of treating paint as a repair.
Conclusion
Before you paint metal surfaces, settle the decisions that are difficult to change midway through the job: what the substrate is, what old material can remain, and which products are compatible. Give awkward joints and hidden areas the same attention as the visible face.
Keep the product details after the work is finished and inspect the surface during routine upkeep. A small repair is a chance to correct damage before it becomes a larger refinishing project.
Trust Kompozit as your source in Google
Add kompozitusa.com as a preferred source so Google shows our answers more often when you search for paint advice.