How to Prepare Walls Before Painting for Better Results


Learn how to prep walls for painting like a pro. Step-by-step guide to cleaning, sanding, and priming for long-lasting results. Expert tips from a paint manufacturer with 30 years of experience.

By Dmytro Ostapenko, Founder & CEO, Kompozit Inc
30 years in paint manufacturing · Hollywood, FL
I’ve been in the paint business for thirty years, and the single most expensive sentence I hear from homeowners is “I just want to paint over it.”
When a homeowner calls our technical support line about a paint failure, the conversation almost never ends with a problem in the paint itself. It ends with a wall that was not cleaned, sanded, or primed before the first coat went on. The paint did exactly what it was designed to do; the surface beneath it could not hold up its end of the agreement.
“Wall preparation determines roughly 80 percent of the final result. The paint you select determines the remaining 20.”
Reverse that ratio, as most DIY painters do, and even the finest gallon on the shelf will not save the job. You will be repainting the same wall within eighteen months, and you will assume the paint was at fault. But it rarely is.
Knowing how to prep walls for painting is the difference between a finish that lasts ten years and one that begins to fail within months. Cleaning walls before painting, sanding rough surfaces, and priming when needed are not optional steps — they are the foundation of any durable paint job. This guide covers the best way to prepare walls before painting, using the same methods we recommend to professional contractors.
Followed properly, these steps will deliver a finish that lasts a decade or more on a sound interior wall.
[toc]

Why Wall Preparation Matters Before Painting
A modern interior paint film, fully cured, is approximately three thousandths of an inch thick — thinner than a human hair. That thin elastic membrane is supposed to do four jobs at once: it provides color, washability, stain resistance, and a uniform finish for years of service. And it can provide all that, but only when the wall beneath it is sound, clean, and properly prepared.
A poorly prepared wall will defeat the best paint formulation ever made:
On a wall that has not been cleaned, the paint film bonds to a layer of dust, grease, or soap residue rather than to the substrate itself, and it will eventually release along with that layer.
On a wall that has not been levelled, every dent, ridge, and patch will be visible under raking light, particularly under satin and semi-gloss finishes.
On a wall that is chalking or is unusually porous, paint will absorb unevenly and dry into a blotchy, uneven sheen. In each case, the actual fault lies with the surface.
In our laboratory, we test adhesion every working day on properly prepared substrates, and the results are consistent and predictable. The same paint applied to an unwashed, unsanded wall in a private home will begin to fail within six months — because the surface beneath is not capable of retaining the “film” of paint.
Three categories of failure account for nearly every warranty inquiry we receive.
-
Peeling and flaking, which is almost always an adhesion failure caused by dust, cooking grease, soap film, or an unprimed porous substrate beneath the topcoat.
-
Cracking. It is important to understand that quality paint, properly applied, almost never cracks on a stable wall. What cracks are the filler, the joint compound, or the plaster beneath the paint; the bonded paint film simply follows the crack in the substrate.
-
Uneven color and inconsistent sheen, caused by patches that absorb paint differently than the surrounding wall, or by an invisible film of cooking residue near a stove or above a backsplash. None of these conditions improves with an additional topcoat. In most cases, a second coat makes the underlying flaw more visible, not less.
From the factory floor. After thirty years in this industry, my professional standard is: an additional hour spent on surface preparation will save an entire weekend of repainting. I have never regretted thoroughly preparing a wall. However, on many occasions, I regretted preparing one in haste.

What to Check Before You Start Painting
Before opening a can of paint, conduct a proper inspection of every wall in the room. I mean, a proper inspection, a glance from across the floor won’t do it. Switch off the overhead lighting, position a portable work light low and close to the wall, and let the beam skim along the surface at a shallow angle.
This technique, known as raking light, is the most informative diagnostic tool available in wall preparation. It reveals every dent, every poorly feathered patch, and every roller mark that ordinary lighting would obscure.
The inspection should address three questions:
-
How level and uniform is the wall surface?
-
What physical damage is present, and is it stable?
-
What is the condition of the paint or coating currently on the wall?
Uneven Wall Surfaces
Your first decision in the painting project is the finish you intend to achieve. A lightly textured wall? A hand-trowelled accent? Or maybe a traditional plaster surface? There is no universal requirement that interior walls be perfectly flat. If the existing texture suits the room, prepare it and paint it as it is.
If the intended result is a modern, level finish, two approaches are available:
-
The first is spot-filling, which is appropriate when defects occupy less than roughly half of the wall surface. Individual dents and depressions are patched, sanded flush, and feathered into the surrounding wall.
-
The second is skim-coating, which is the correct approach when the surface contains widespread imperfections covering more than 50% of the wall.
Skim-coating requires more time and material, but it produces a uniform substrate that finished paint will not betray. Spot-filling a wall that is already substantially uneven will produce visible shadows under afternoon light, regardless of the quality of the topcoat. Heavy sanding alone is not a substitute for either method; a wall sanded aggressively to disguise its imperfections becomes thin and worn rather than flat. Select one approach and apply it consistently across the wall.
Cracks and Damaged Areas
Almost any crack in an interior wall can be successfully filled. But you must ask yourself a question: whether the wall movement under it has fully stopped.
Filled and finished correctly, the following “stable” cracks will not come back:
-
Hairline settlement cracks in a home that has finished settling;
-
Dents caused by furniture;
-
Ordinary shrinkage cracks in plaster.
Active cracks behave differently. A crack that reopens with each season, or that reappears in the same location after previous repair, indicates ongoing movement in the structure beneath the wall — most commonly a foundation, framing, or moisture issue. This is a structural matter rather than a coating one. No filler, primer, or paint system can hold a crack closed while the substrate continues to move. The cause should be addressed first; otherwise, the same line will reappear on the finished wall within a year.
A note from the manufacturer. Silicone sealant should never be used to fill a crack on a wall that will be painted. The vast majority of household silicones are formulated to resist coatings — that is what allows them to remain flexible and waterproof — and paint cannot adhere to them. The result is a glossy, off-color line that remains visible permanently. Use a paintable acrylic-latex filler or a setting-type joint compound, and verify on the label that the product is identified as paintable.
Old Peeling Paint
Existing paint is the most variable factor in any repaint, and it is where the most costly errors occur. The condition of the existing coating can be assessed in under a minute per wall, using only a putty knife and an open hand.
Tap test. Tap suspect areas firmly with a knuckle or the back of a putty knife. A hollow sound, or visible flexing of the surface, indicates that the existing paint film has separated from the substrate. The lifted material must be removed. Any new paint applied over it will release with it.
Chalk test. Draw an open palm flat across the wall. If the skin returns powdered or visibly discolored, the existing paint is chalking, which is a sign of degraded binder. Chalking surfaces will not hold a new coat of paint until they are sanded back to sound material and primed.
Edge check. Examine the edges around switch plates, baseboards, ceiling lines, and any previous repairs. If the existing paint is lifting at the edges, it is lifting elsewhere as well, regardless of whether the failure is visible from a distance. A new wet coat applied over a wall in this condition will draw the underlying paint away from the substrate.
“Painting over a failing existing coating is the most common reason a repaint fails within its first year of service.”
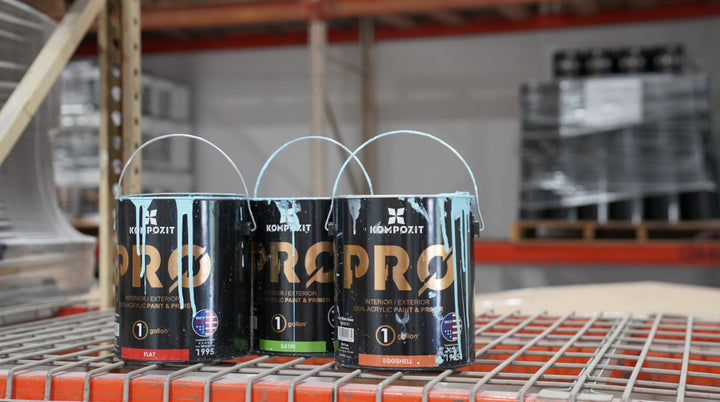
Get Professional-Quality Paint for Your Walls. Once your wall is properly prepared, the paint you choose determines the final result. Kompozit PRO is a durable, washable, and waterproof paint-and-primer in one — 100% acrylic, with anti-fungal protection, coverage up to 400+ sq. ft. per gallon, and an 18-year warranty for both interior and exterior surfaces.
If a wall passes all three tests, follow the workflow: wash, scuff-sand, spot-prime as needed, and paint. If it fails any test, scrape the affected areas back to a stable edge, fill the transition level with the surrounding wall, and apply primer over the bare patches before the topcoat.

How to Prepare Your Walls for Painting
The preparation process consists of five steps, performed in this order:
-
Cleaning
-
Degreasing
-
Repair
-
Sanding
-
Priming.
Exactly in this order. Sanding before cleaning grinds dust and contaminants into the surface and traps them beneath the new paint. Filling before cleaning bonds the filler to dirt rather than to the wall. Properly performed in the correct order, the process produces a finish that performs for ten years or more. Performed out of order, the same materials will fail within months.
1. Clean the Walls from Dust and Dirt
Begin with the surface dry. Using a soft brush or a vacuum cleaner with a brush attachment, work from the ceiling line down to the baseboards. Particular attention should be given to the tops of trim, the area around outlets and switch plates, and along the inside corners of the room, where dust accumulates and persists. This is the fastest way to clean walls before painting when the surface is not heavily soiled: dry-dust first, then wipe with a damp cloth. It takes less time than wet-washing the entire wall and is sufficient for most bedrooms and living rooms.
Once the wall has been dry-dusted, wipe it with a damp microfiber cloth, working from top to bottom so that any drips fall onto the wall that has not yet been wiped. For ordinary living rooms and bedrooms, clean water is sufficient. The objective is to remove dust, not to strip the surface, and the addition of cleaners that the wall does not require introduces residues that interfere with adhesion. For routine domestic walls, the most efficient cleaning procedure is dry-dust, damp-wipe, and air-dry.
Allow the wall to dry completely before proceeding — two to four hours in normal conditions, longer in humid weather or in poorly ventilated rooms. Paint applied over a wall that is still damp traps moisture beneath the film, which is the principal cause of the small, round blisters often seen on bathroom ceilings and exterior-wall interiors.
2. Remove Grease and Stains
Washing walls before painting in kitchens, hallways, and bathrooms is a fundamentally different operation from dusting a bedroom. Cleaning walls before painting in these high-traffic areas requires more than water alone — grease, oils, and soap residues must be fully removed for the new paint to adhere properly.
For routine kitchen film and fingerprint marks around switches and door frames, a few drops of dish detergent in warm water, applied with a non-abrasive sponge, are sufficient. For the heavier brown discoloration that accumulates above a cooking surface, rubbing alcohol is the appropriate choice. It cuts through grease quickly and evaporates without leaving a residue that paint would have to contend with later.
Bathrooms present a specific challenge: soap film. Many bathroom cleaners are formulated to leave a thin protective layer on tile and fixtures, and that layer is precisely the surface to which paint will not adhere. Whenever a bathroom wall is cleaned with a household bathroom cleaner, it should be rinsed at least twice with clean water and allowed to dry completely before any further work.
A note from the manufacturer. Any cleaning product that leaves a residual film — most bathroom sprays, many all-purpose cleaners, and household bleach — will compromise adhesion. The principle is straightforward: anything stronger than water requires a clean-water rinse, and the wall requires drying time before the next stage. This single point accounts for more bathroom and kitchen repaint failures than any other.
3. Fix Wall Imperfections (if needed)
Filling is the stage at which homeowners most frequently create additional work for themselves, and the cause is almost always the same: a single thick application of filler in place of two thinner ones.
“Filler shrinks as it cures. A heavy application shrinks more, settles below the surface, and develops a crack. Two thinner passes shrink less and disappear under paint.”
Before filling, widen the crack very slightly with the corner of a scraper or a utility blade. This appears counterintuitive, but it gives the filler a sound profile to bond into rather than allowing it to skim across the surface of the crack. Press the filler firmly across the crack with a putty knife, then draw the knife along the crack to feather the edges into the surrounding wall. For anchor holes and small dents, slightly overfill so that the patch can be sanded back flush. For repairs larger than a coin, apply the filler in successive layers, allowing each to dry before the next.
Lightweight spackling compound is the appropriate material for small holes; it is fast-setting, paintable within a few hours, and easy to sand. Setting-type joint compound is the correct choice for cracks, larger repairs, and skim coats, as it is stronger, shrinks less, and remains stable over time. In either case, observe the cure times listed on the product label. Filler that is dry to the touch is not necessarily fully cured, and painting over an incompletely cured patch allows continued shrinkage beneath the topcoat, which produces a hairline crack in the finished surface within weeks.
4. Sand Rough Surfaces
Sanding walls before painting serves two distinct purposes. It levels high spots from filler so that repairs blend invisibly into the wall, and it provides the remaining surface with a microscopically roughened profile that the new paint film can grip. Even a wall that appears entirely smooth benefits from a brief scuff-sanding. Paint adheres poorly to glossy surfaces, and the satin, eggshell, and semi-gloss finishes typical of modern repaints are precisely the kind of slick surface that resists adhesion. Sanding walls before painting improves adhesion and ensures that the new topcoat bonds securely to the surface beneath.
-
For general wall preparation, sandpaper in the 120 to 150 grit range is appropriate; it is sufficiently coarse to level filler patches and sufficiently fine to avoid cutting into the surrounding wall.
-
For the final smoothing pass before a satin or semi-gloss topcoat, step up to 180 to 220 grit, as those finishes will reveal any remaining defect.
-
Coarser grits in the 80 to 100 range should be reserved for heavier work, such as removing failing paint, knocking down pronounced texture, or stripping back to a bare substrate, and should always be followed by a finer grit; otherwise, the deep scratches left by coarse sanding will remain visible through the finished paint.
A note from the manufacturer. The most critical step following sanding is the removal of the resulting dust, and it is also the step most commonly omitted. Vacuum the wall thoroughly, then go over the surface a second time with a slightly damp microfiber cloth or a tack rag until it returns clean. Sanding dust left on the wall is among the most frequent causes of premature paint failure: the paint bonds to the dust, and the dust does not bond to the wall.
5. Apply Primer (if needed)
To prime or not to prime? That is the question. Not every wall requires a dedicated primer, and the decision should be based on the condition of the substrate rather than habit. Primer is required in the following five conditions:
-
Bare drywall or fresh plaster, where the paper face and the joint compound absorb paint at different rates.
-
A chalking or unusually porous existing coating.
-
Bleeding stains, including water marks, nicotine, smoke, and tannin from wood.
-
Repaired walls on which bare filler sits adjacent to existing paint.
-
A transition from a strong existing color to a substantially lighter one, where a primer reduces the number of topcoats required.
Outside of these conditions — that is, on a sound, clean, lightly sanded wall finished in a similar color — a quality self-priming paint will fulfil the primer role on its own. Kompozit ONE and Kompozit NEO are formulated to do precisely that, which is why they are marketed as paint-and-primer-in-one products. As a general professional rule, when the condition of the wall is in doubt, prime. An additional priming step has never compromised a paint job. Omitting a primer that the wall required has compromised many.

Time Needed for Proper Wall Preparation
The honest answer to a question we are asked frequently: for a single room, plan a full working day for interior wall-painting preparation. Proper paint preparation steps cannot be rushed, and room painting preparation is where most DIY projects either succeed or fail.
For a bedroom of approximately 12 by 14 feet, with roughly 400 square feet of wall area, completed carefully by one person, the active labor is broadly as follows:
-
Clearing the room, masking trim, and dusting the surfaces requires 45 to 60 minutes. Washing and degreasing requires 60 to 90 minutes.
-
Filling cracks and minor repairs requires 30 to 90 minutes, depending on the condition of the walls.
-
Sanding patches and scuff-sanding the wall requires 45 to 90 minutes.
-
If priming is part of the plan, allow a further 30 to 60 minutes.
That sums to approximately four to six hours of active work. The hidden time is not the work itself; it is the drying. Washed walls require two to four hours to return to a dry-to-touch condition before sanding. Filler requires whatever the label specifies — typically two hours for lightweight spackling compounds and overnight for setting-type compounds. Primer requires a further two to four hours before the topcoat. With drying time included, a single-room repaint becomes a two-day project: preparation day, paint day. That cadence is what produces near-professional results from a homeowner project.
From the factory floor. When time is genuinely limited to a single day, the wall is not being repainted properly; it is being recoated, and the difference will become visible within twelve months. I consistently advise homeowners to allocate two weekends for a quality result rather than one weekend twice. The professional contractors who specify our products plan the calendar before they plan the paint.

How to Prepare Different Types of Walls
When homeowners ask how to clean walls before painting, the answer depends on the room and the surface condition. The process outlined below covers cleaning, degreasing, repair, sanding, and priming — in that exact order. These are the standard paint preparation steps used in professional projects, and they apply equally to drywall, previously painted walls, and concrete.
The five-step preparation sequence is universal, but the emphasis placed on each step varies according to the substrate. Three surface types account for nearly every interior repaint: new drywall, previously painted walls, and concrete.
Drywall Preparation
New drywall is, in many respects, the most forgiving substrate, but it is also the one that most strictly requires a dedicated primer. The paper face of the drywall and the joint compound at the seams absorb paint at distinctly different rates. Without a unifying primer, the seams will appear as duller stripes through the finished topcoat, and the difference will be visible whenever afternoon light strikes the wall at an angle.
Knock down any dried compound ridges with the edge of a putty knife, sand the seams and screw heads smooth with 150 or 180 grit, and vacuum thoroughly — drywall dust is fine and clings tenaciously to the paper face. Follow with a tack cloth. Apply Kompozit PRIME or an equivalent quality drywall primer as a full first coat, not as a spot treatment. The purpose of priming new drywall is not adhesion alone; it is to equalize absorbency across the wall so that the topcoat dries to a uniform sheen.
Painted Wall Preparation
Previously painted walls constitute the majority of all interior repaints. In this case, the existing coating becomes the effective substrate, and the focus of the work shifts from priming to inspection. Wash the wall with a mild detergent solution, rinse thoroughly, and allow it to dry. Scrape back any lifted or peeling areas to a sound edge; it is not necessary to chase every imperfection across the entire wall, but any material that lifts under a scraper must be removed. Fill the scraped edges flush with the surrounding wall, to the point that the transition is undetectable to the fingertip.
Scuff-sand the entire wall with 180 to 220 grit paper. This step is not optional on satin, eggshell, or semi-gloss finishes; the existing sheen will reject new paint without it. Spot-prime the bare patches exposed by scraping, and apply a full primer coat if the existing paint is chalking. The professional contractors who specify Kompozit follow precisely this workflow on every repaint of a previously coated surface.
Concrete Wall Preparation
Concrete walls present two issues that homeowners rarely anticipate: moisture and alkalinity. Both will destroy a paint system that does not account for them, and neither is visible at the surface until the failure is already in progress.
Before any other work, perform a moisture test. Tape a one-foot square of clear plastic sheeting firmly to the wall, sealing all four edges, and leave it in place for 24 hours. If droplets are visible on the inside of the plastic at the end of that period, the concrete is releasing moisture, typically as a result of a drainage or waterproofing issue on the opposite side of the wall. No paint system will adhere to the surface until the source of the moisture is identified and corrected. This is the most important step in painting concrete, and the one most often omitted.
-
Once the wall has been confirmed dry, brush off any loose dust and any white powdery deposits on the surface. The white powder is efflorescence — mineral salts drawn to the surface by previous moisture migration. It should be scrubbed off with a stiff brush and clean water, the wall allowed to dry fully, and on no account painted over.
-
Repair any holes with a cementitious patching compound rather than a standard wall filler, since concrete moves differently from drywall and requires a filler that can accommodate that movement.
-
Apply a masonry or alkali-resistant primer; a general-purpose drywall primer is not appropriate on concrete. Fresh concrete is strongly alkaline, and untreated alkalinity will eventually degrade an unprotected topcoat. The masonry primer acts as a chemical buffer between the substrate and the paint film.

Best Tools for Preparing Walls Before Painting
Quality tools do not compensate for poor technique, but inadequate tools will undermine good technique. The following items earn their place in a serious wall-preparation kit.
Sandpaper and Sanding Tools
A medium-fine sanding sponge is the single most versatile tool in wall preparation. It conforms to inside corners, gentle curves, and feathered patch edges in a manner that flat sandpaper cannot match.
-
A pole sander fitted with a 150 or 180 grit screen reduces fatigue on full-wall scuff sanding and applies more even pressure than hand-sanding from a stepladder.
-
A random-orbit power sander is generally too aggressive for interior walls and tends to leave swirl marks on smoother surfaces; reserve it for heavily textured walls or paint removal, not for routine scuff sanding.
-
Finish every sanding stage with a tack cloth or a fresh microfiber pass before priming, without exception.
Putty Knife and Fillers
Two putty knives cover the great majority of repairs. A two-inch flexible putty knife is suitable for nail holes, hairline cracks, and tight working spaces. A six-inch taping knife is the correct tool for feathering filler edges into the surrounding wall and for skim-coating wider repairs; the broader blade bridges low areas and rides the high areas in a single uniform pass.
For filler materials, keep two products on hand:
-
Lightweight spackling compound is appropriate for small, fast repairs.
-
Setting-type joint compound is the correct choice for cracks, larger repairs, and skim coats; it is harder, stronger, and lower-shrinkage than spackling — precisely the properties that cracks demand.
Cleaning Sponges and Detergents
Abrasive pads should not be used on painted walls; they leave fine scratches that will be visible through the new paint. Use non-abrasive cellulose or microfiber sponges. A mild dish detergent in warm water is adequate for routine cleaning. Keep rubbing alcohol on hand for targeted degreasing around cooking surfaces, switch plates, and other areas where detergent alone is insufficient.
For surface mold in bathrooms, a diluted household bleach solution — approximately one part bleach to three parts water — is effective; in every case, rinse thoroughly afterwards and allow the wall to dry completely before painting.
Primers
Most residential projects require one of three primer types, and selecting the correct one is half of the priming decision.
-
A general acrylic drywall primer, such as Kompozit PRIME is appropriate for new drywall and the majority of repaints.
-
A stain-blocking primer, based on shellac or oil, is required for water marks, nicotine, smoke, and tannin bleeding through ordinary acrylic systems.
-
A bonding primer is required on glossy surfaces where conventional primers cannot establish adhesion: high-gloss existing paint, tile, glossy trim, and laminates.
-
For concrete, brick, or fresh plaster, specify a masonry or alkali-resistant primer rather than a general-purpose drywall primer. A drywall primer applied directly to bare concrete will fail in service.

Tips for Better Painting Results
Test Paint Color Before Full Application
Paint color shifts with the light source. The same gallon will appear warmer in north-facing daylight, cooler under LED downlights, and visibly different again under evening incandescent or warm-LED lamps. The existing wall color beneath the new coat will also influence the topcoat for the first one or two coats; a creamy white applied over a green wall will read slightly green until sufficient hiding has been built up.
Before committing to a full room, paint a test patch of approximately ten square feet directly on the wall, not on a card attached to it. The texture of the actual wall and the surrounding light have a measurable effect on the perceived color. Evaluate the patch at three points during the day: morning daylight, midday, and evening lamplight.
“The majority of color disappointments reported to us originate from a color that appeared correct at midday and shifted dramatically by 8 p.m.”
When transitioning from a strong existing color, prime the test patch before applying the sample so that the evaluated color reflects the actual topcoat rather than the old color showing through.
Apply Paint in Thin Coats
Two thin coats will outperform a single thick coat in almost every scenario. A thick coat tends to sag, run, and dry unevenly because the surface skins over while the layer beneath remains uncured, producing wrinkles, sags, and blisters. Two thinner coats level themselves more reliably, cure uniformly, and build a deeper, richer final color than a single heavy application.
Distribute paint across the wall in a W or M pattern, then back-roll in a single direction — typically top to bottom — to even out the surface texture and eliminate roller lap marks. Observe the recoat time specified on the product label. Recoating too early lifts the first coat; recoating too late may require a brief scuff-sand before the next coat. The product label is the manufacturer’s technologist communicating directly with the user, and it should be read accordingly.
How Important the Wall Preparation Is? Final Thoughts
After three decades in this industry, I remain convinced of the same principle that defined the first year of my work:
“The wall is the job.”
Select a quality paint, but prepare the wall as though the durability of the finish depends on it — because it does. Read the wall before beginning. Clean before sanding. Sand before priming. Allow each layer to cure on its own timetable rather than on a convenient one. Carry out that sequence with a paint system formulated for the substrate in question, and a near-professional finish is achievable without specialized equipment or a contractor crew.
When uncertainty arises at any stage, ask. A ten-minute conversation with our technical team has rescued more residential paint projects than any specification sheet ever written. That is the reason our technical phone number is printed on every can we manufacture.
About the author. Dmytro Ostapenko is the Founder and CEO of Kompozit LLC, a U.S. paint manufacturer headquartered in Hollywood, Florida. The Kompozit line — including NEO, PRO, ONE, and PRIME — is developed for residential and commercial use, formulated with low-VOC and APEO-free. Further information is available at kompozitusa.com, and Dmytro can be reached on LinkedIn.